Realista WordPress Plugin Guide
The Realista WordPress Plugin Connection allows real estate agents to automatically sync their property listings from their WordPress website to the Realista platform. This integration removes the need to manually add properties in multiple places, saving time and reducing errors.
With the Realista plugin, your WordPress listings can be securely connected using an API token, enabling Realista to fetch property data such as titles, prices, locations, images, and descriptions. Once connected, properties can be imported and kept updated through a simple synchronization process.
The setup process is designed to be simple and agent-friendly, requiring only a few steps: installing the plugin, connecting your website, mapping property fields, and starting the sync. After configuration, Realista will automatically import and manage your listings, helping you keep your property data organized and up to date.
This integration ensures that your WordPress properties and Realista listings stay synchronized, allowing you to manage your real estate inventory efficiently from one place.
1. Create Account
You need an active profile on Realista to connect your WordPress site.
1.1. Navigate to the Sign Up Modal.
1.2. Create a real estate agent account.
1.3. Complete the identity verification process to unlock full syncing capabilities.
2. Credit Packages
The WordPress Sync Engine is a professional-tier feature. You need a compatible Credit Packages.
2.1. Go to Credit Packages in your dashboard.
2.2. Select any plan.
2.3. Complete the payment.

3. Install the Realista WordPress Plugin
3.1. Install Plugin
3.1.1. Log in to WordPress Admin.
3.1.2. Go to Plugins → Add New.
3.1.3. Search for Realista Property Sync.
3.1.4. Click Install Now and then Activate.
3.1.5. After activation, a new Realista menu will appear in the WordPress admin sidebar.
3.2. Create a Mapping Plan
3.2.1. Go to WP Admin → Realista.
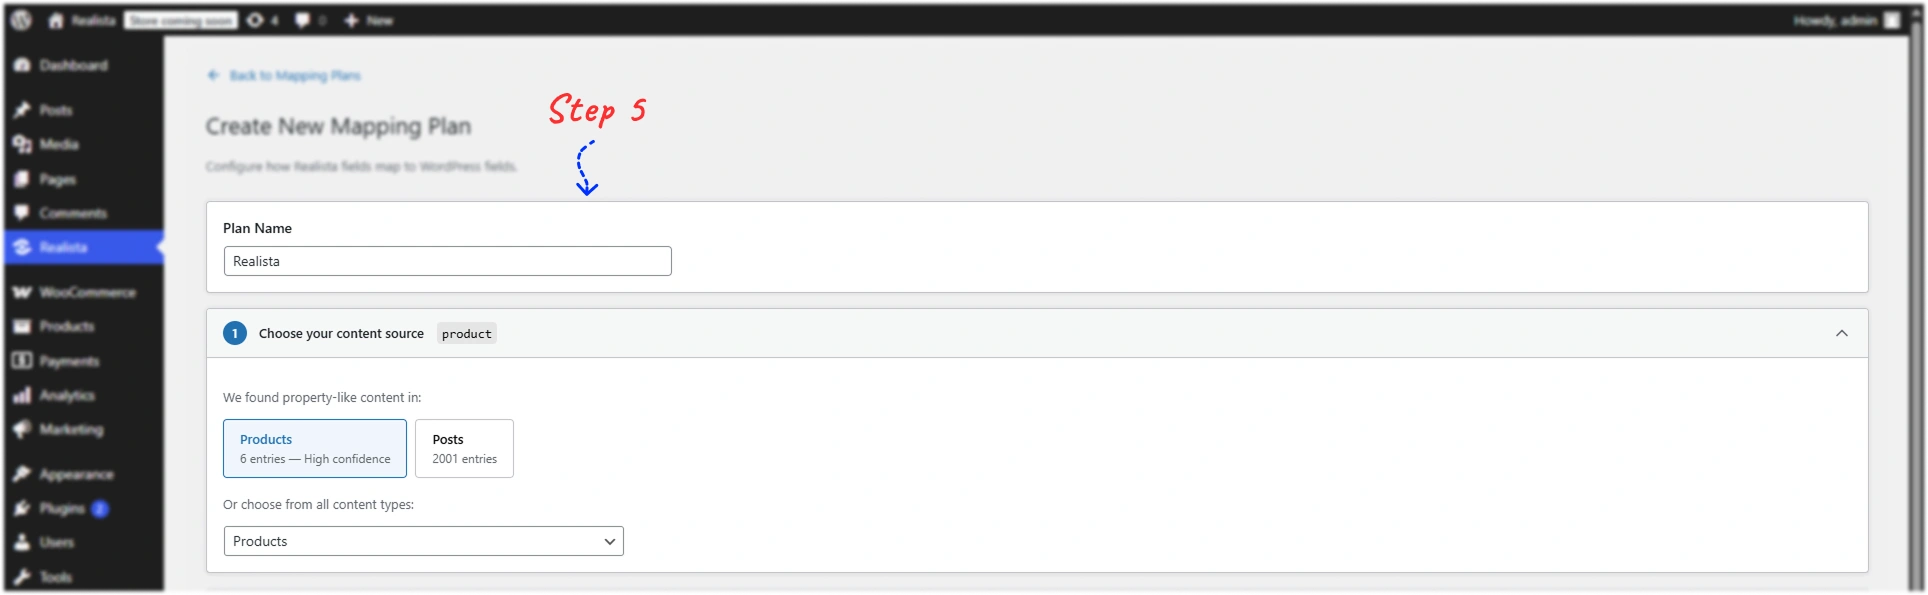
3.2.2. Click Create New Mapping Plan (or Create Plan).
3.2.3. Enter a Plan Name and select the Post Type containing your property data (e.g., property, listing, or product).
A mapping plan defines which WordPress content will be synchronized with Realista.
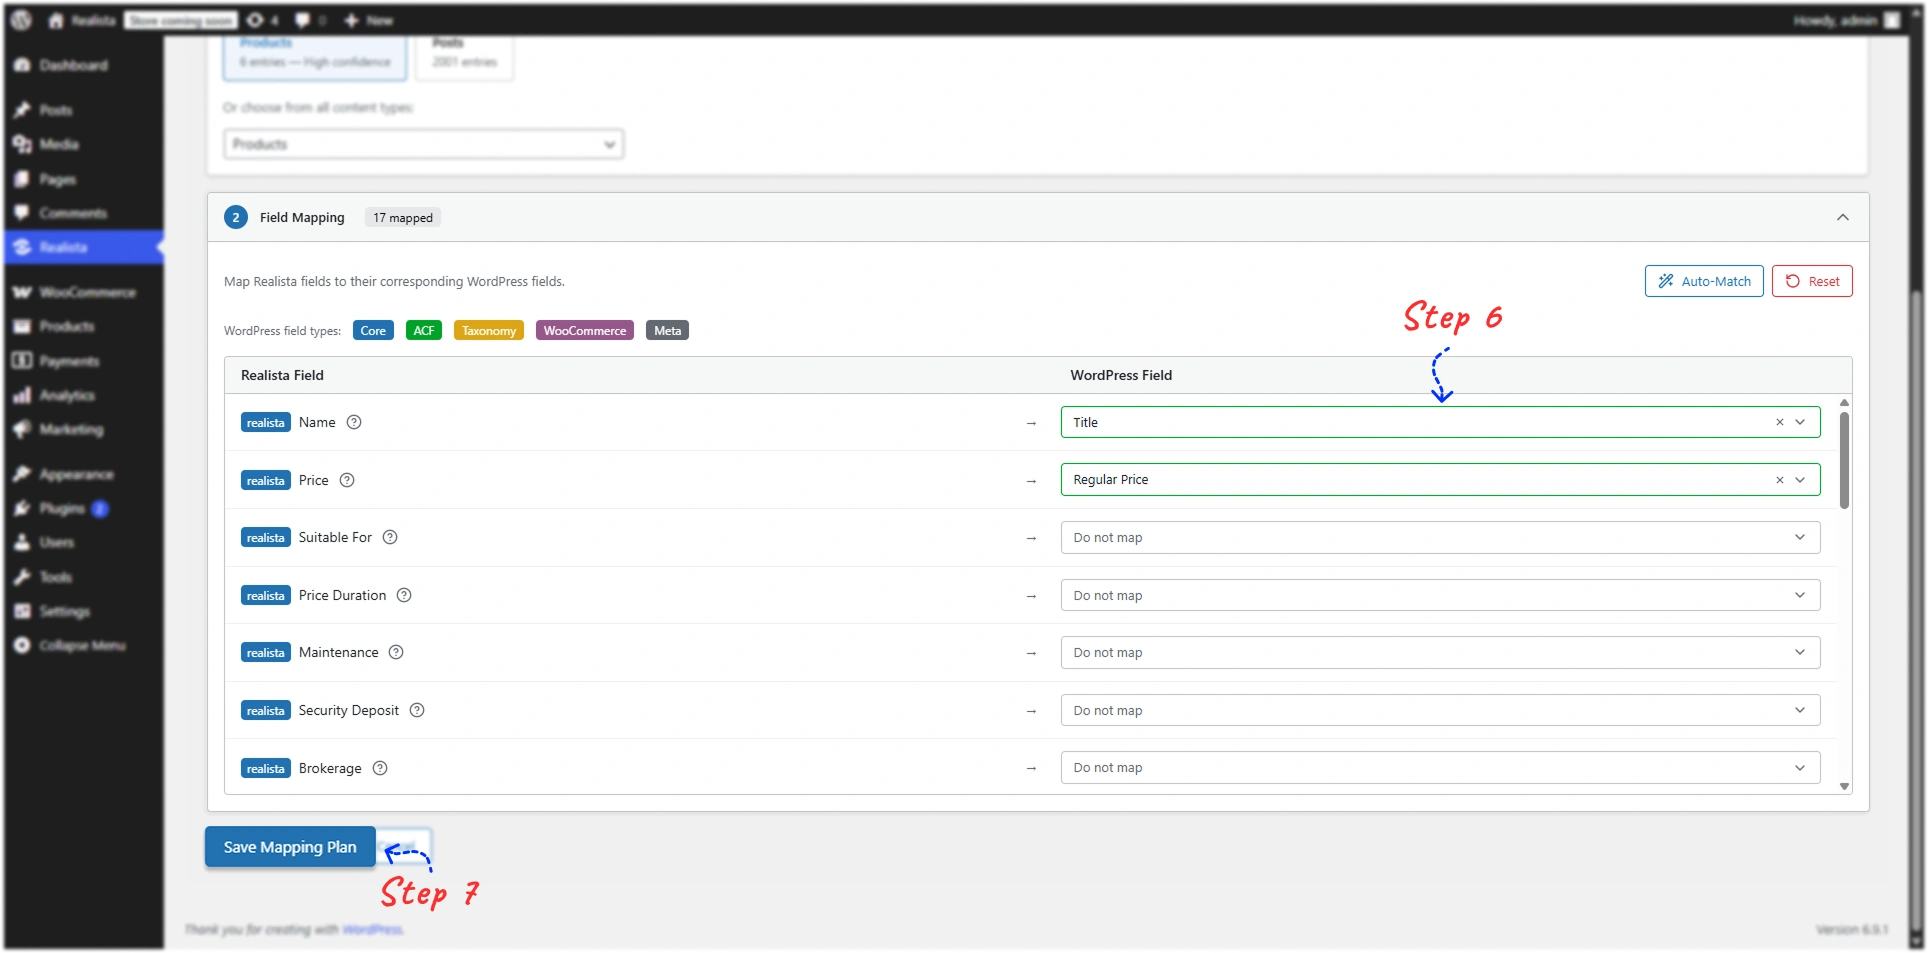
3.3. Configure Field Mapping
Mapping means the process of connecting WordPress fields to the fields required by the Realista platform. It tells the plugin where each piece of data should come from in WordPress when sending property information to Realista.
Map Realista fields to the corresponding WordPress fields.
Example:
| Realista Field | WordPress Field |
|---|---|
| Property Name | post_title |
| description | post_content |
| price | price |
| city | city |
| image | featured_image |
After configuring the mappings, click Save Mapping Plan (or Save Plan).
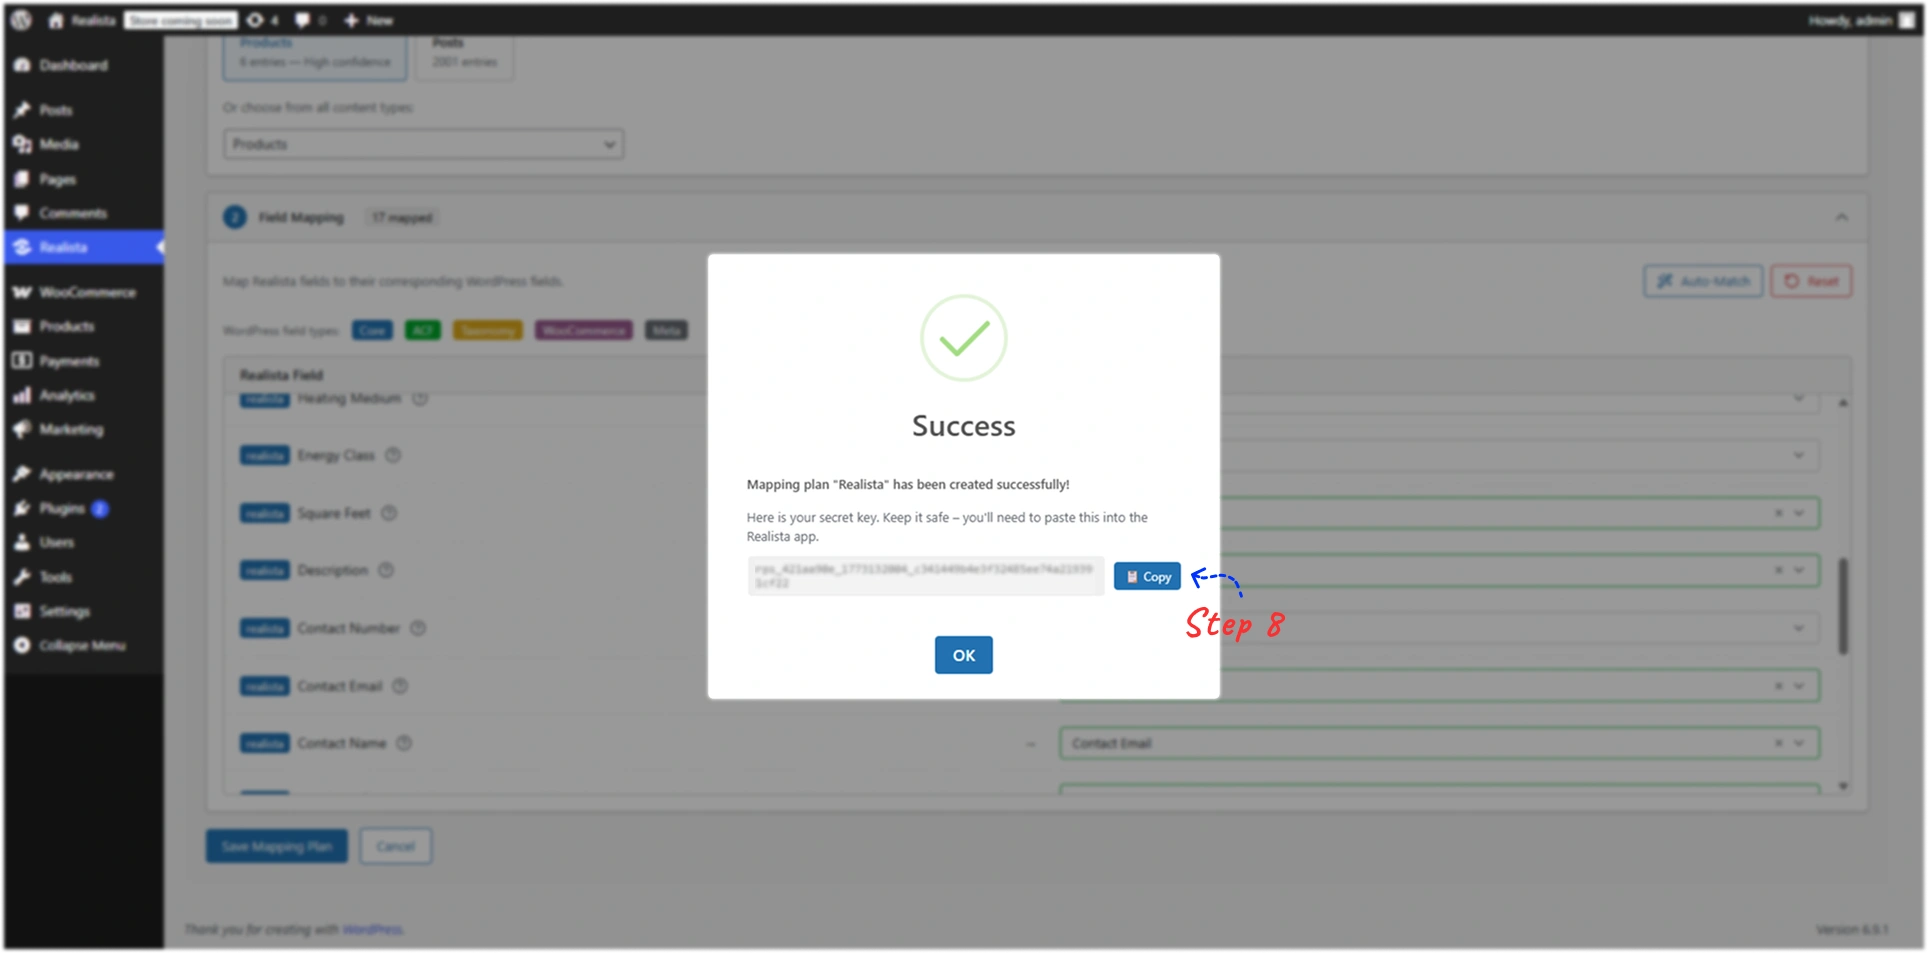
3.4. Generate Secret Key and Activate the Plan
3.4.1. Open the saved mapping plan.
3.4.2. Click Generate Key to create the Secret Key.
3.4.3. Ensure the plan status is Active.
3.4.4. The secret key will be required to access the sync API.
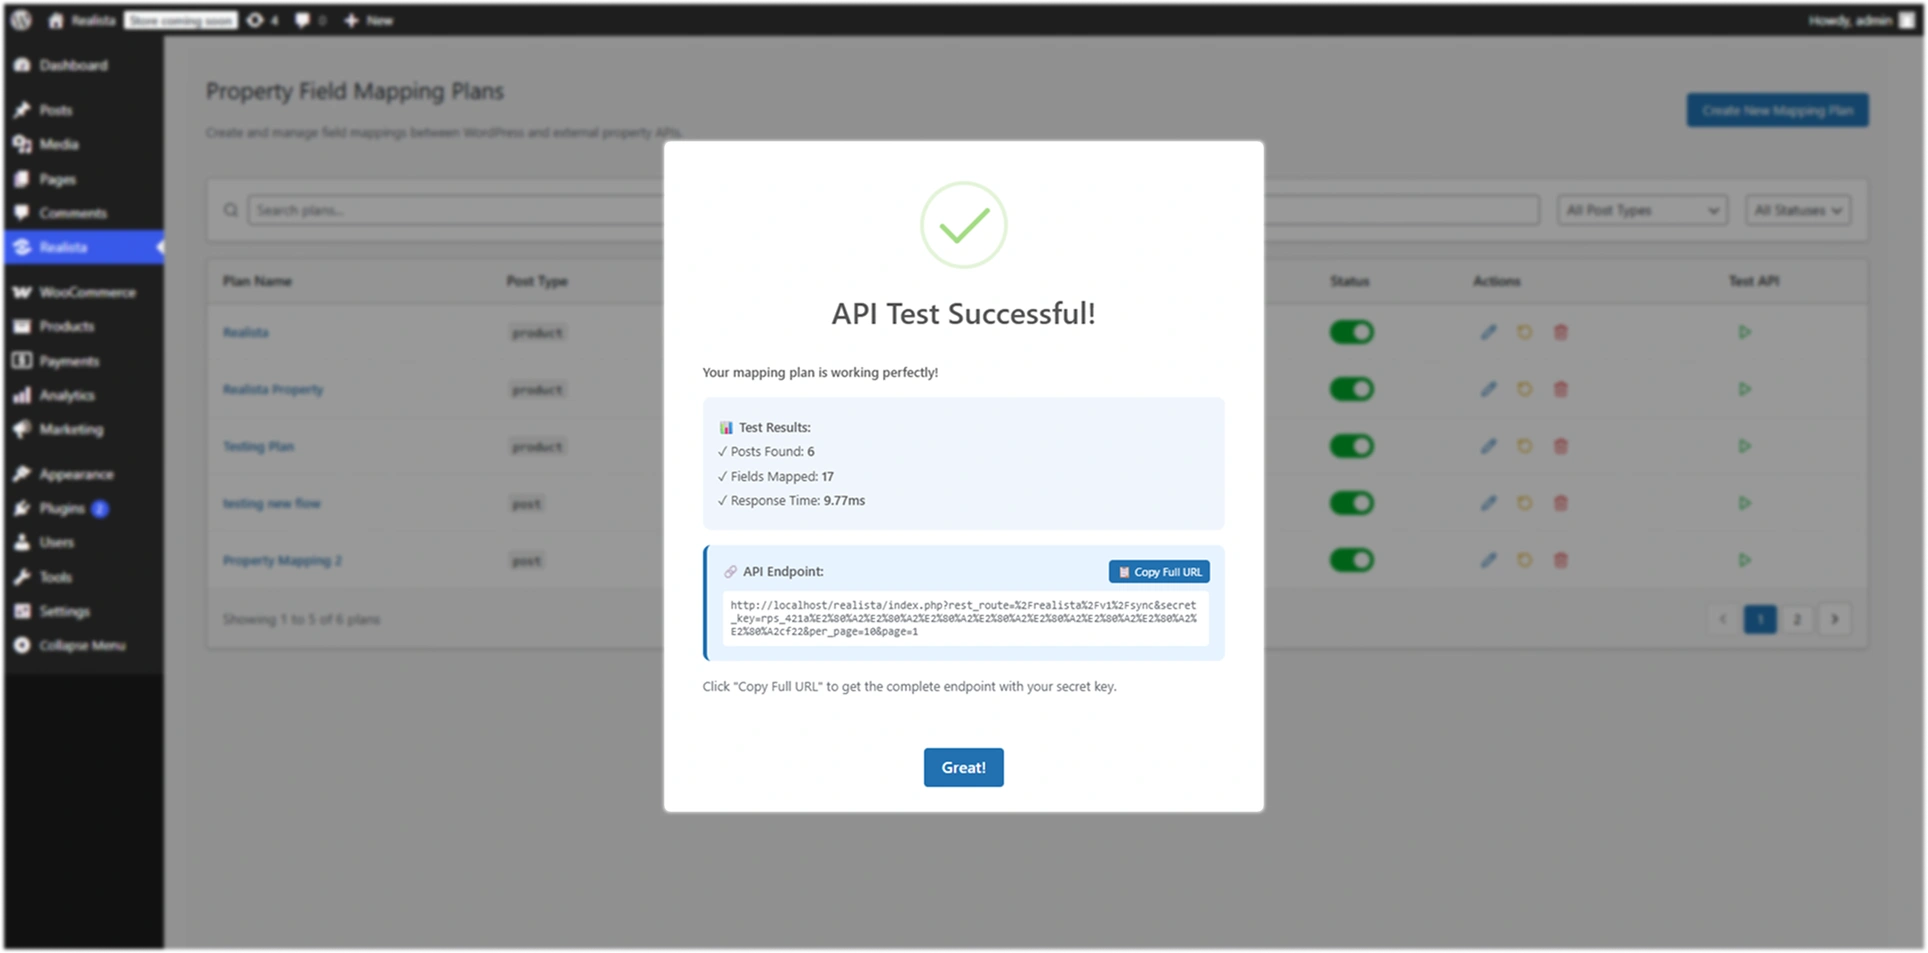
3.5. Use the Sync API
Realista retrieves property data using the sync endpoint.
Endpoint
GET /wp-json/realista/v1/sync
Example
https://your-site.com/wp-json/realista/v1/sync?secret_key=YOUR_SECRET_KEY&page=1&per_page=20
Provide the sync URL and secret key to the Realista platform to enable synchronization.
4. Connecting WordPress to Realista
How to Connect WordPress to Realista
4.1. Add Your Website Connection
4.1.1. Open the Realista dashboard.
4.1.2. Navigate to: Dashboard → WP Plugin → Add WP Plugin.
4.1.3. You will see a WordPress Plugin Setup Wizard.
Fill the following fields:
Then click Next. This step connects your website to Realista.
5. Property Field Mapping
Match your WordPress Custom Post Type fields to Realista's global schema. This ensures data consistency across the marketplace.
| Realista Field | WordPress Meta Key |
|---|---|
| Property ID | _property_id |
| Price | _property_price |
| Subcategory | property_type_tax |
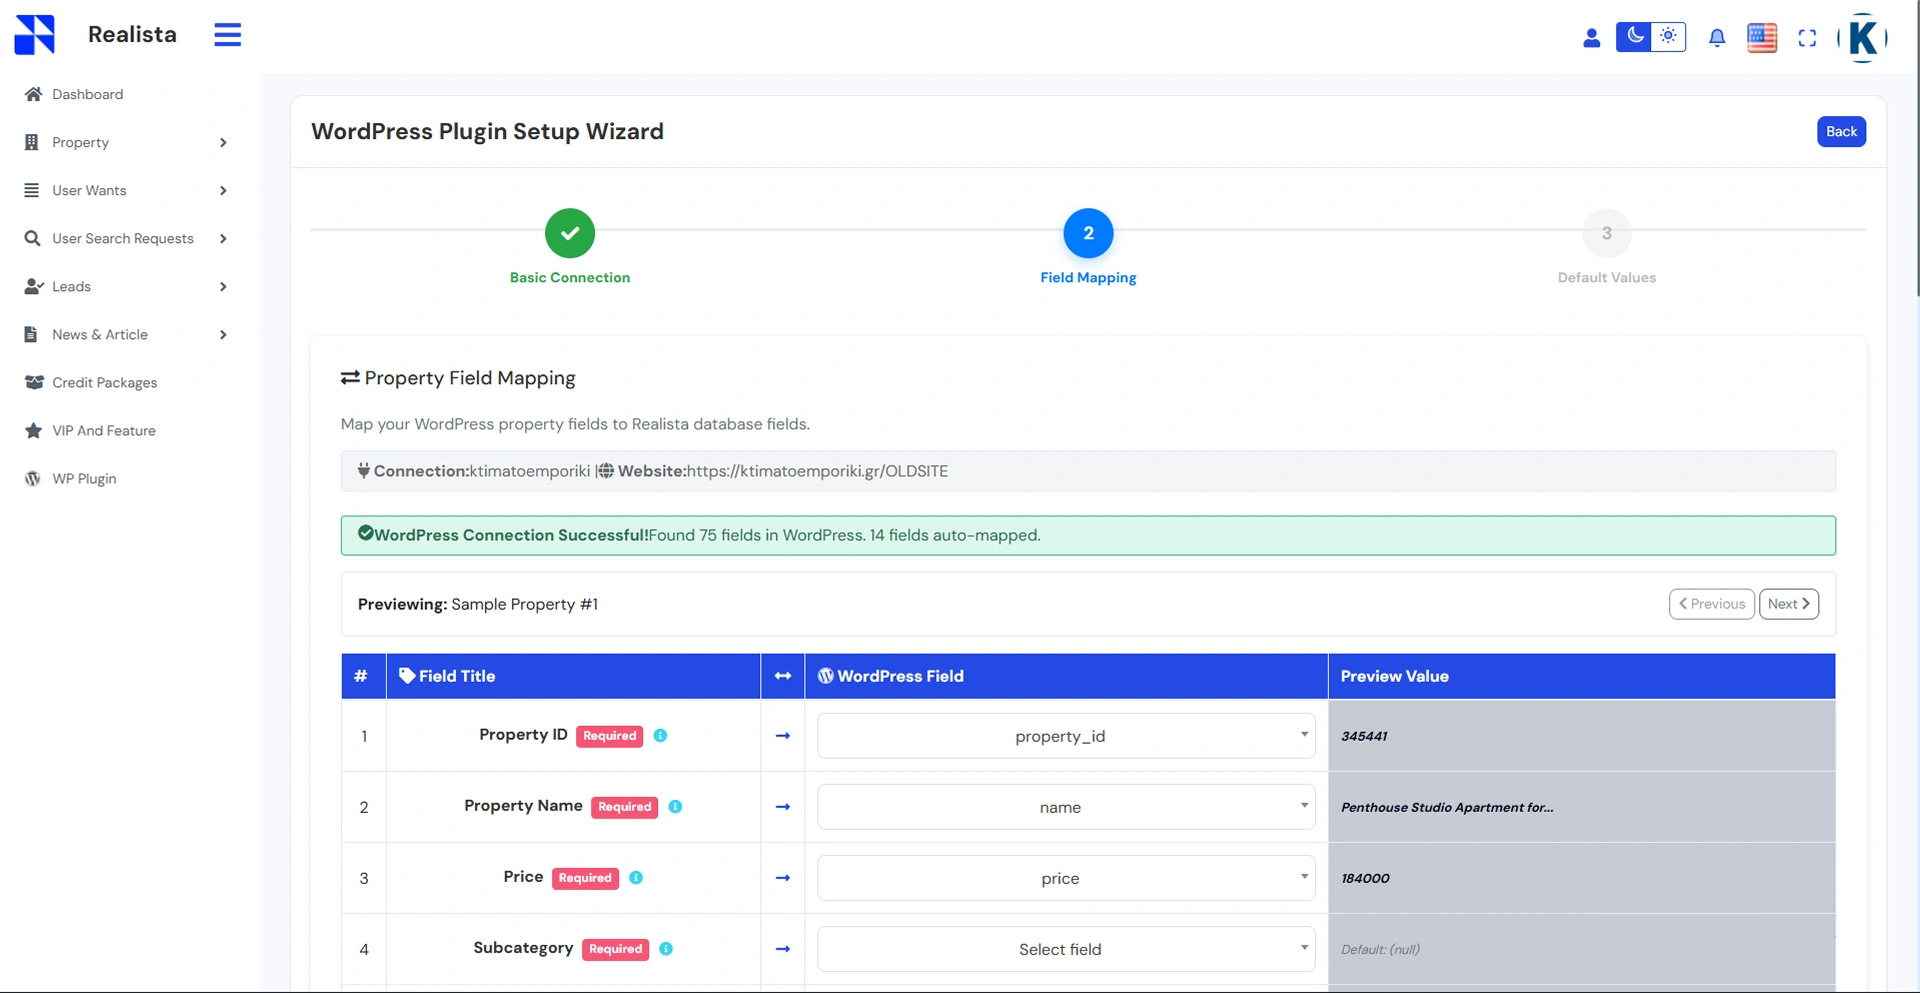
This preview helps you:
5.1. Verify if your mapping is correct
5.2. See how your WordPress data will appear in Realista
After checking everything, click Next.
6. Default Field Values
If your WordPress site is missing certain mandatory fields, you can set fallback defaults. For example, if no agent email is provided in the WP meta, the system will use your global account email as the primary contact for that lead.
6.1. Contact Name
6.2. Contact Email
6.3. Contact Phone
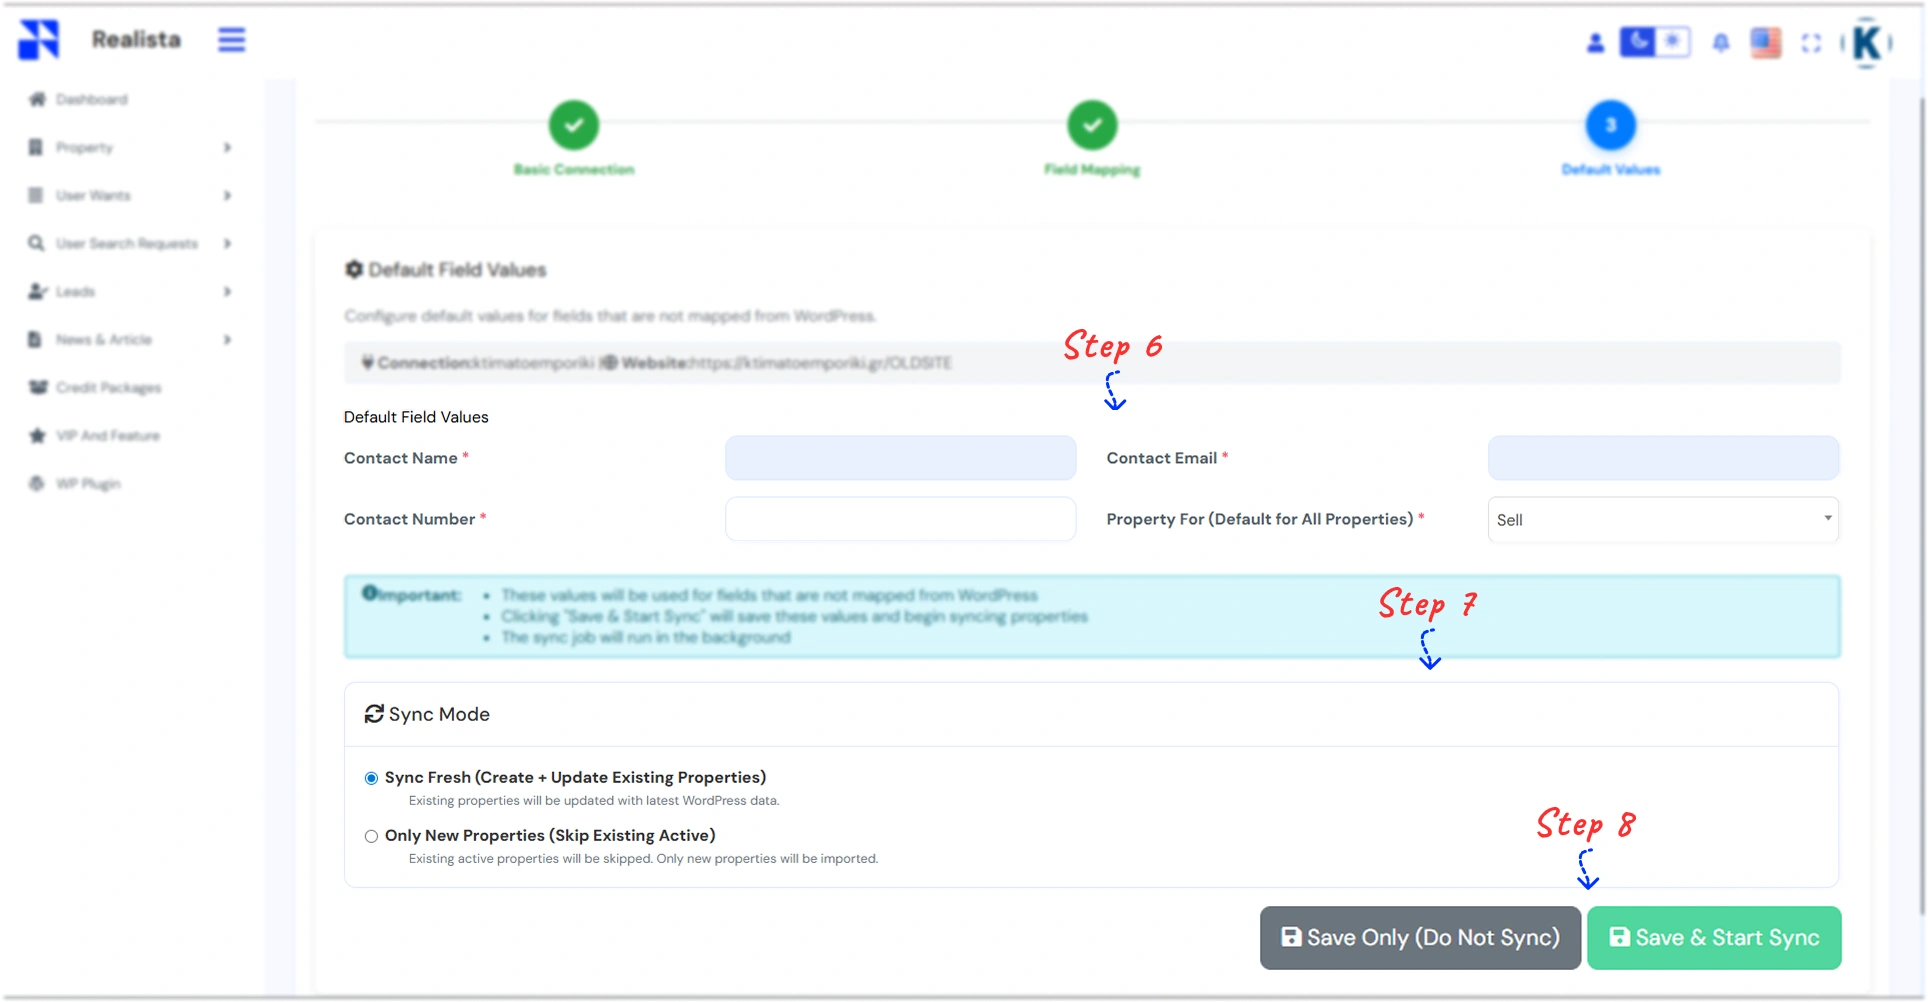
7. Sync Modes
7.1. Sync Fresh
Updates all properties in Realista every time the sync runs. Best for keeping listings fully up to date.
7.2. Only New Properties
Imports only new listings from WordPress. Existing properties will not be modified.
8. Final Step — Save or Start Sync
You will see two buttons.
8.1. Save Only
Saves the configuration but does not start syncing yet.
8.2. Save & Start Sync
Starts the property import immediately. Your properties will begin syncing from WordPress → Realista.
The sync runs in the background, so you can continue using the dashboard.
9. After Sync — What Happens Next?
Once syncing starts:
9.1. Your WordPress properties are imported
9.2. They appear inside your Realista property dashboard
9.3. They can be shown on your Realista platform
9.4. Your listings are now automatically connected.
9.5. Result
Your properties are now:
9.5.1. Connected between WordPress and Realista
9.5.2. Automatically synchronized
9.5.3. Ready to be displayed to clients
Your website now showcases your properties professionally.
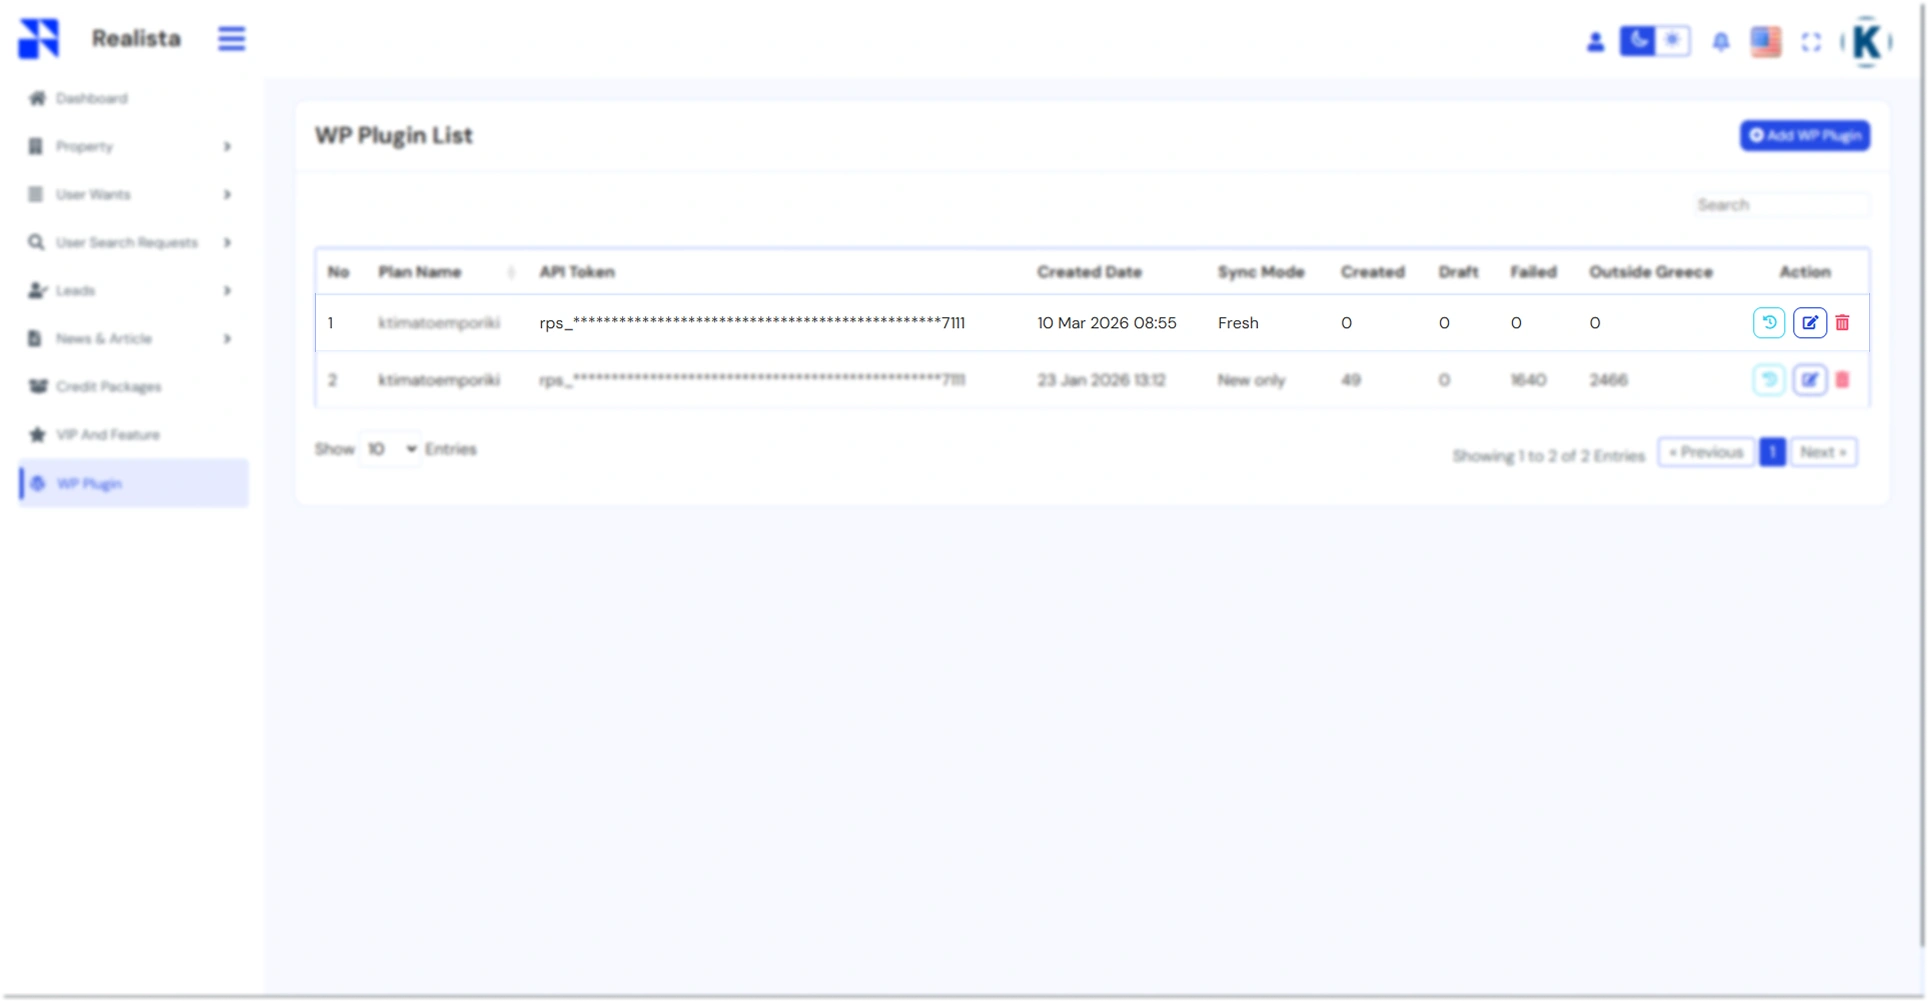
10. WP Plugin Management
View and manage all connected WordPress instances from your main plugin list.
11. Import History & Troubleshooting
How to View Property Import History
After starting the property sync, you can check the import results and property status using the Import History page. Follow these simple steps.
11.1. Open WP Plugin Page
11.1.1. Login to your Realista Dashboard.
11.1.2. From the left menu, click WP Plugin.
11.1.3. This page shows your connected WordPress websites.
11.2. Open Import History
11.2.1. Find your connected website in the list.
11.2.2. Go to the Action column.
11.2.3. Click the History icon (clock symbol).
11.2.4. This will open the Import History page.
11.3. View Import Summary
At the top of the page you will see the sync summary.
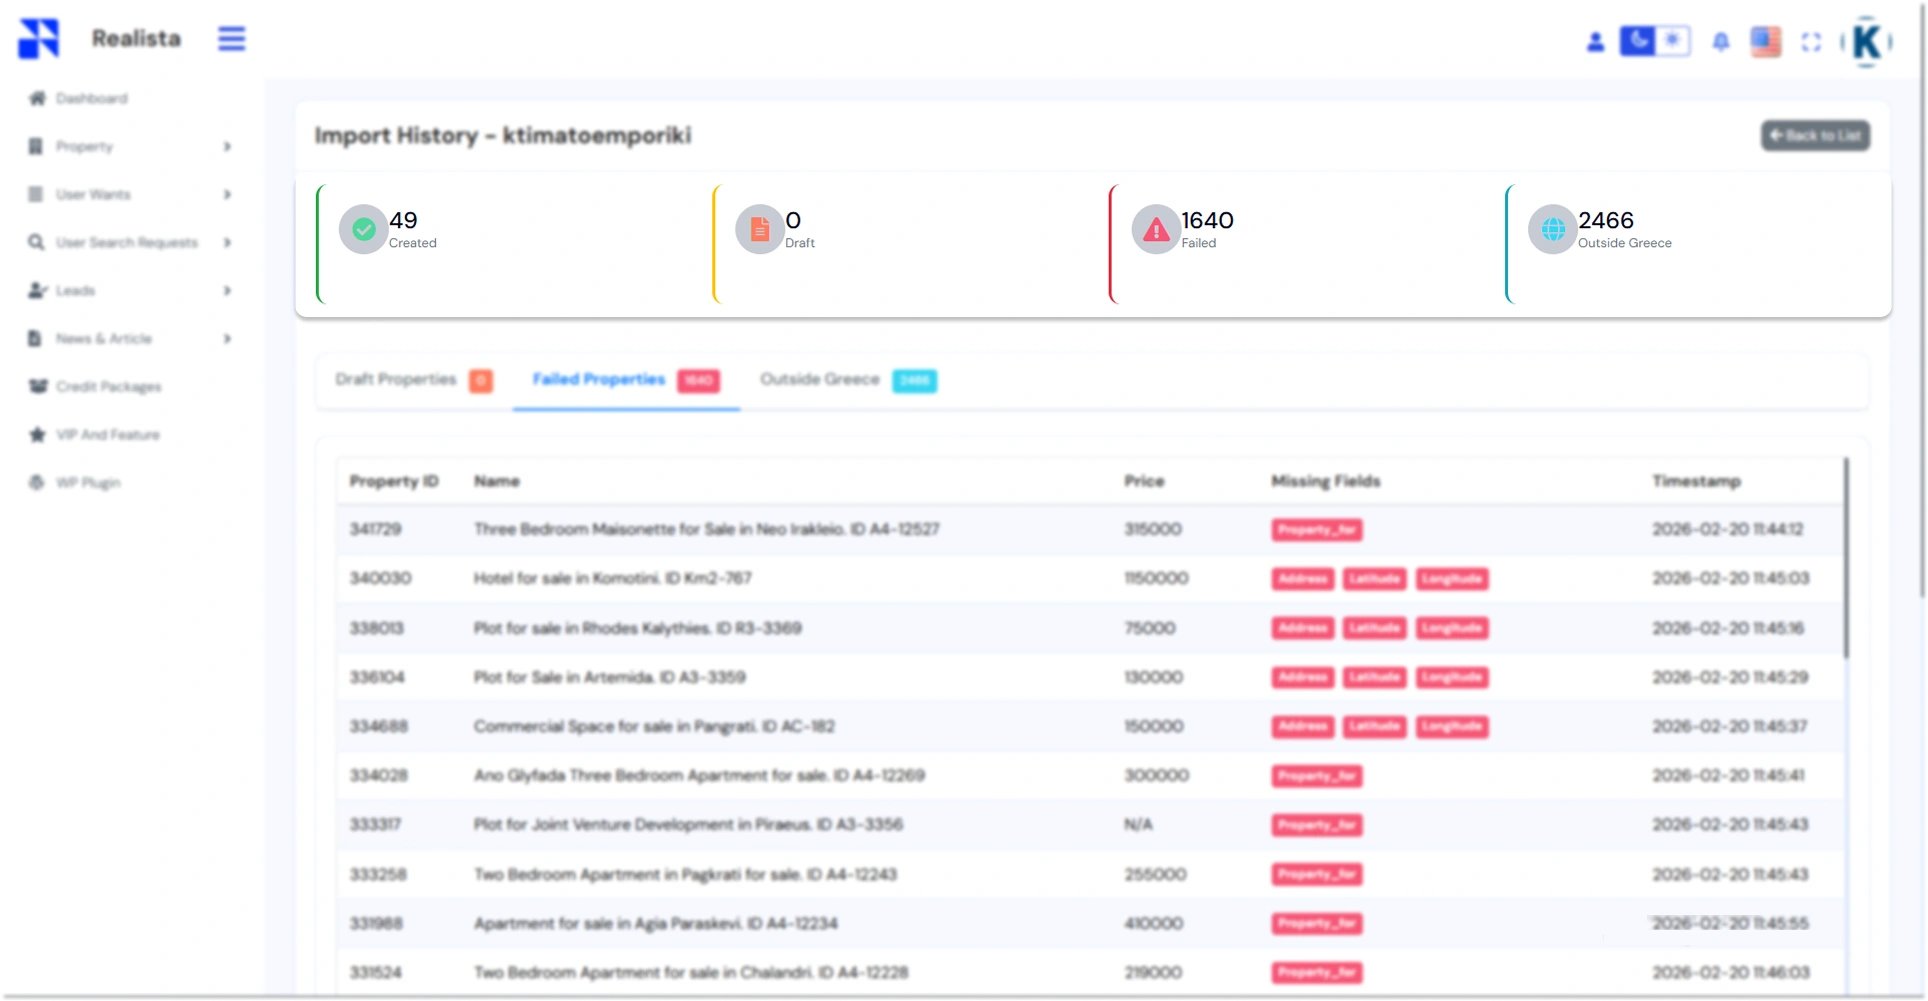
11.4. Review Property Details
Below the summary you will see a property list table. Each row shows:
11.4.1. Property ID – Property ID from your WordPress site
11.4.2. Name – Property title
11.4.3. Price – Property price
11.4.4. Missing Fields – Required fields that are missing
11.4.5. Timestamp – Time when the sync happened
11.5. Fix Failed Properties
If properties appear in the Failed Properties list:
11.5.1. Go to your WordPress property listing.
11.5.2. Edit the property.
11.5.3. Add the missing information such as: Property Type (Sale / Rent), Address, Latitude, Longitude.
11.5.4. Save the property.
11.5.5. Then run the sync again from Realista.